UNDER CONSTRUCTION
Home Assistant VM
For years I ran Home Assistant in a Docker container. First on a Raspberry Pi then on this same HP T630. With my move to Proxmox, It was time to give the full Home Assistant OS a try in a VM. I only have the one server with no fallback and Home Assistant has become vital in my wife and I’s daily routines. Initially I used the TTeck Home Assistant OS VM Script to get things online as fast as possible. Once things were back online, I rebuilt my own VM in the following manner.
Downloading the HA Image
The Home Assistant Proxmox image is in qcow2 format. This appears to be a common filetype for VMs but there is no easy way to import it in the GUI.
The first step is to navigate the Home Assistant website and find the appropriate image for Proxmox.
From the Proxmox CLI, navigate to the image storage as this seems to be the appropriate place to keep these files.
cd /var/lib/vz/template
Create a qemu directory and cd into it.
mkdir qemu
cd qemu
Use the wget command followed by the download URL to download the image. As of this writing the command is as follows:
wget https://github.com/home-assistant/operating-system/releases/download/13.1/haos_ova-13.1.qcow2.xz
After the download completes, unzip the image. Make sure the command matches the downloaded file.
unxz haos_ova-13.1.qcow2.xz
Creating HA VM
With the image downloaded and unzipped, we can build the VM. Select Create VM. The following options must be selected:
- General
- VM ID & Name
- OS
- Do not use any media
- System
- Machine: q35
- BIOS: OVMF (UEFI)
- EFI Storage: local-lvm *This is the default but may vary based on installation.
- Pre-Enroll Keys: Unchecked
- Disks
- Remove any assigned disks
- CPU:
- Cores: 2 *This is the minimum.
- Memory: 2048 MB *This is the minimum however, I use 4 GB (4096 MB)
Verify the selections then finish building but do not start the VM. The disk image needs to be loaded first using the qm importdisk command. Be sure to specify the VM ID, 108 in the below example, use the correct image path, and point to the selected EFI storage.
qm importdisk 108 /var/lib/vz/template/qemu/haos_ova-13.1.qcow2 local-lvm
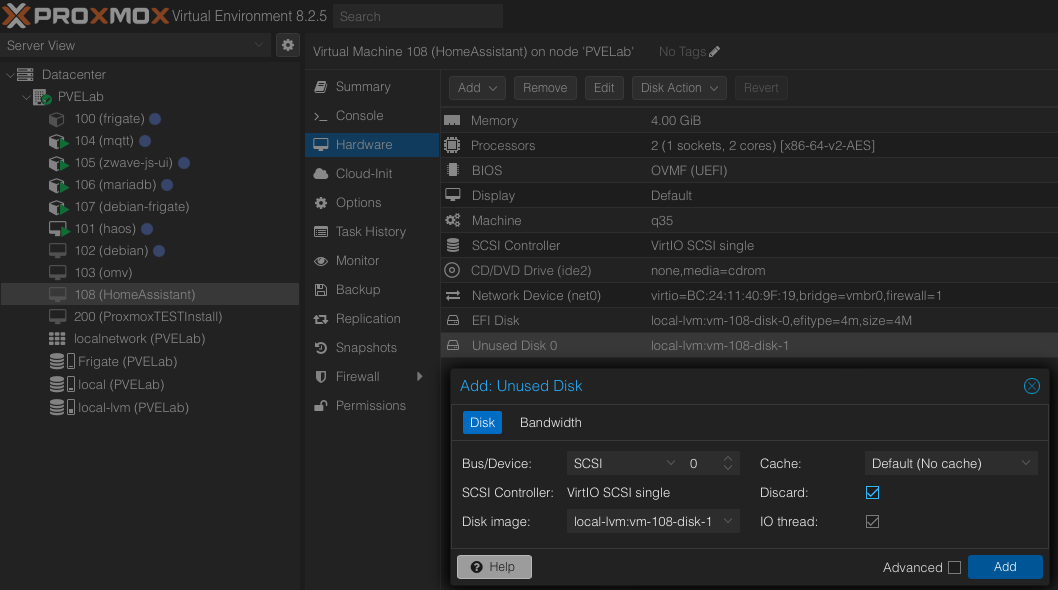
Once imported, the disk must be assigned. Navigate to the VM and Hardware. Select and Edit the unused disk. If its an SSD, check Discard then click Add.

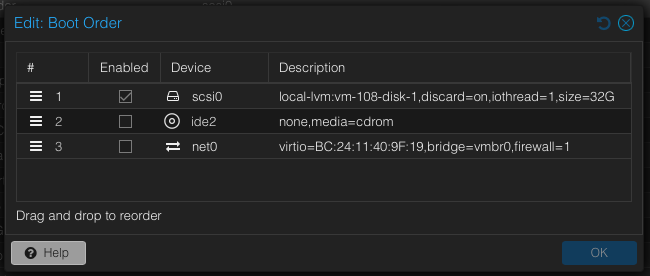
Now, select this new disk for boot. Options > Boot Order > Edit. Select the new disk, probably scsi0 and deselect all others.


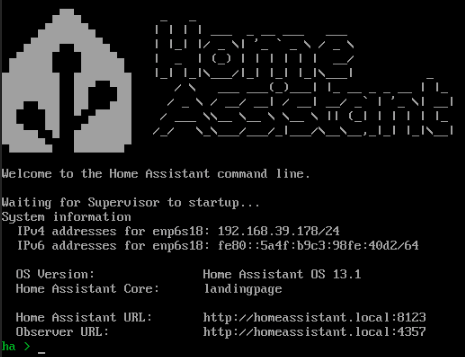
Start the VM with the Start button in the top right corner and watch the console. As long as no errors appear the console should boot into the familiar Home Assistant CLI and display its IP address. The front end should also be accessible from that local IP as usual.
Next Steps
With the VM running, it is time to start messing around in Home Assistant. Check out my upcoming sections on some of the services and automation I’ve got going on.