I borrowed a lot of this information from the Docker in OMV 7 guide on omv-extras.org
Running Docker on OMV
Table of contents
Docker requires the omv-extras package which was installed during my initial deployment of OMV.
Part of the reason I chose OMV as my NAS OS was due to the Docker support. I plan on at least running Frigate and maybe a few other containers on this system. To get started, enable the “Docker repo” under the System > omv-extras tab. Once that is done, the openmediavault-compose plugin can be installed.
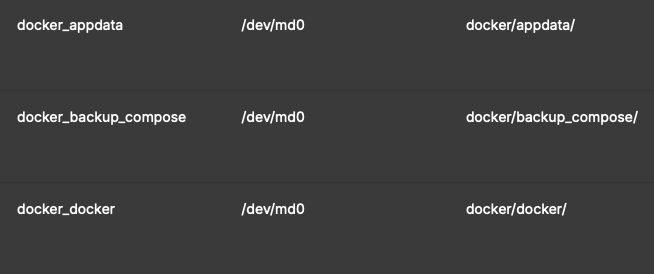
We also need a few shared folders for Docker to function. At minimum we need a folder for persistent app data, backups, and docker image storage. They can be named using whatever scheme you prefer. They should also be located on a separate drive from the OMV system. I used that NVMe RAID0 array I set up earlier with the following structure:

- /md0
- /docker
- /appdata
- /backup
- /docker
- /docker
Compose Settings
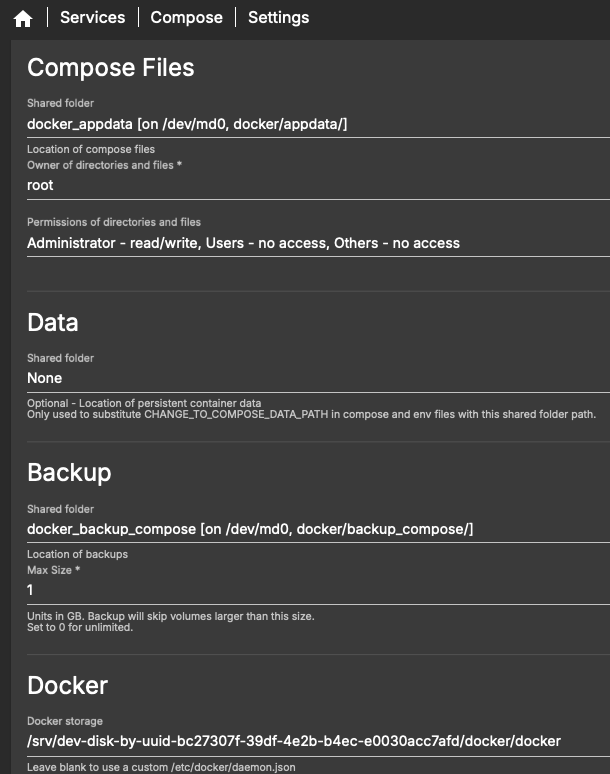
Navigate to Services > Compose > Settings. In this area we will tell the compose plugin where to find and write files using the shares we just setup.

Compose Files - This is where the generated compose files and persistent container data (like config files) are stored. The drop down menu should be populated with the available shares. I’m using the /appdata directory for this.
Data - This path acts like a variable for use in the Docker Compose files to map bind mounts or other fixed data paths. For now, I’m ignoring it as I will specify data locations per container.
Backup - A backup location for persistent data. Once again, the drop down should populate with available shares. I used the /backup directory from above. I’m keeping it on the same NVMe array as I’ll only use it to restore a broken container and this whole array will be backed up.
Docker - Docker stores images, system data, and temp files here. The default path is one on the host OS. It needs to be changed to avoid wear on our OS drive. I used the /docker directory. This path does not have a dropdown, the absolute path of the shared folder must be pasted here manually.
Check the Config
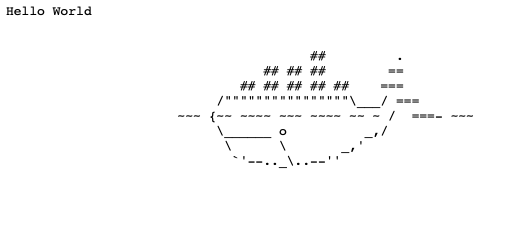
So we’ve got the plugin installed and all of the paths set. Normally, Docker has us run the hello-world container in the CLI to confirm everything is working. The OMV plugin only runs off Docker Compose and unless we’re in the CLI, everything is done via the GUI. Fortunately, I came across this cccheck/hello-world image that spins up a container serving a simple http website.
I’ve adopted the run command as a compose file on port 8000:
services:
    hello-world:
        image: crccheck/hello-world
        container_name: hello-world
        ports:
            - 8000:8000

Add a new compose file under Services > Compose > Files by clicking the plus icon and pasting in the above compose example. Start the container. If it successfully starts, we should also be able to navigate to host.ip:8000 and see a website with an ASCII Docker logo.
Next Steps
Now that Docker is running, we can get started on setting up some real containers! I’ve already got some decent knowledge of Docker. I had previously hosted my HomeLab only using containers. I won’t spend too much time on adding/removing containers or other general Docker environment management. I have however included some documentation on the the containers I’m running, how I set them up, and some other nuances.