OMV File Systems
Table of contents
Can I See The Drives?
Before we can even setup a file system, our machine needs to be able to see the drives. Assuming all of the drives have been installed in the machine, they should be visible under Storage > Disks.
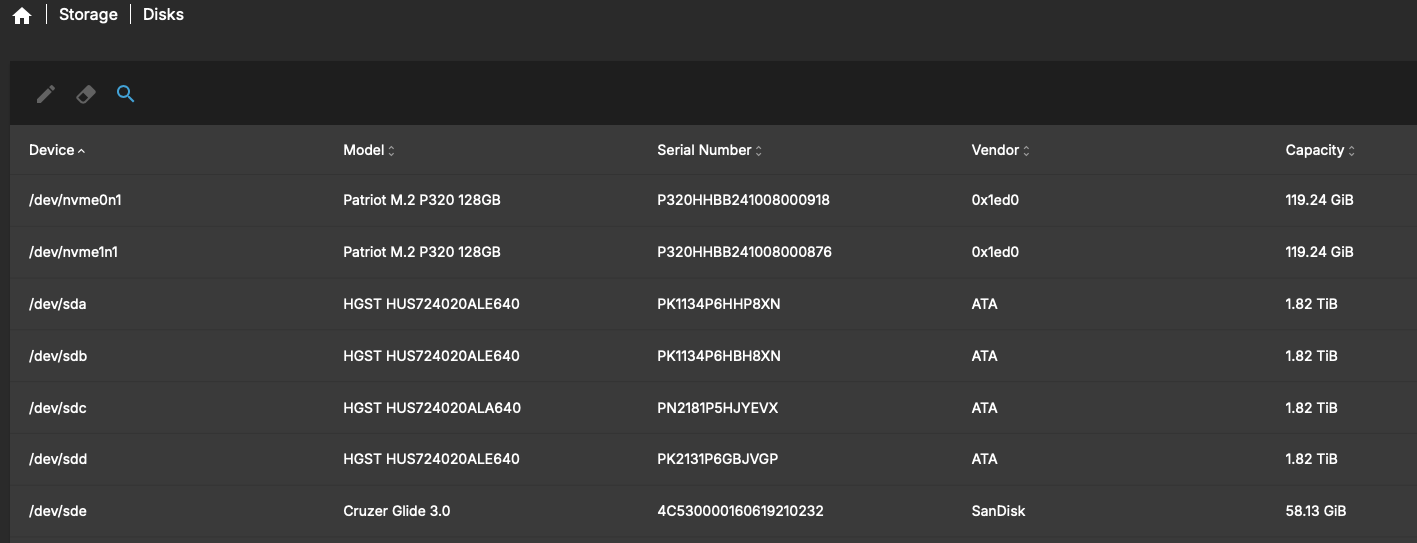
Ideally, file systems should be defined on clean drives. I started this build with fresh hard drives but still performed a quick wipe on them prior to writing the file system. Now is a good time to wipe all the disks.
This will erase any data currently on the drive. Make sure you select the correct disk!
Navigate to Storage > Disks and select the drives to be wiped. Click the eraser icon then follow the on screen prompts to wipe the drive.

Configuring the File Systems
I settled on using ZFS for my data array’s file system. It seems to be the current standard for data storage and security. I was between ZFS and BTRFS simply because BTRFS appeared to be natively supported by OMV. I’m also using standard software RAID for my application storage drives.
A lot of ZFS info was borrowed from raulfg3’s post on the OMV forums and adapted for my current version of OMV.
Installing the PVE Kernel
This plugin is found in the omv-extras package which was installed during my initial deployment of OMV.
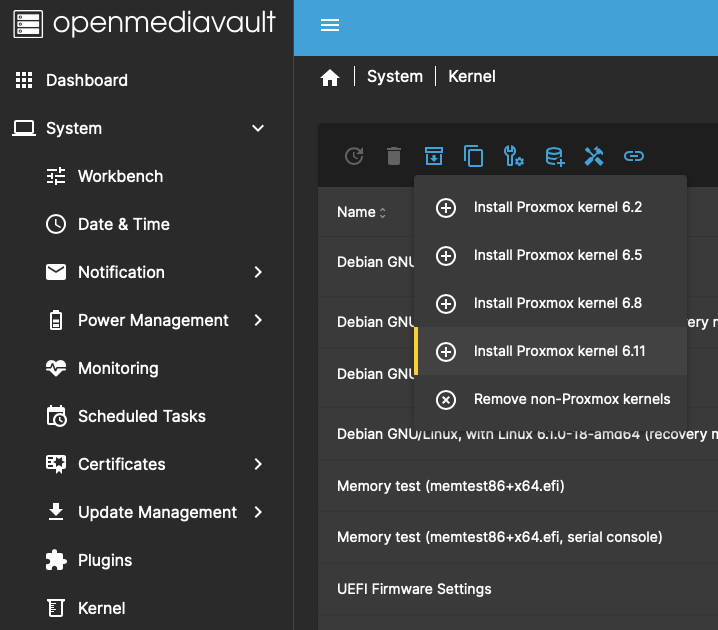
The Proxmox kernel is required to run ZFS. Start by finding and installing openmediavault-kernel plugin. Once it installs, navigate to the new tab under System > Kernel. On the top toolbar, highlight the icon that looks like a download box and install the Proxmox kernel. I selected the most recent (kernel 6.11 as of this document). The install will take some time. Once it completes, the new kernel should automatically have been selected as the default.
Reboot the system.
Once the system reboots, make sure it booted with the new kernel. Under Diagnostics > System Information the kernel field should display the newly applied kernel.

The PVE Kernel is required before installing the ZFS plugin. I don’t think it matters too much in regards to other parts of the system but I figured it was best to be installed first. This avoids a possible failure due to a kernel change.
Multiple Disk and Device Management (mdadm) RAID
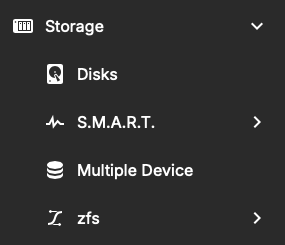
Install the openmediavault-md plugin. We should be pretty good at this by now so I don’t think I need to tell you where to go. Once it installs, the Multiple Device tab should be visible in the Storage menu.
From here, we can create a multiple device, commonly known at RAID, software array. Select the RAID level and devices followed by Save. In this example I used the stripe level. This does not provide any redundancy. In fact, it sometimes can be considered less reliable because if one disk fails all data is lost.
The array should now be displayed as a device in the GUI along with related information.

Create and Mount the File System
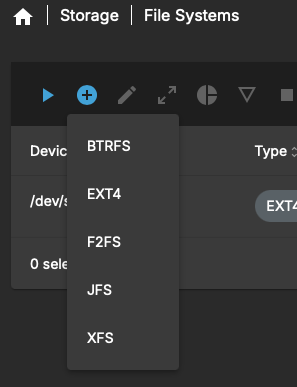
We now need to create a file system on this array and mount it to OMV. Navigate to Storage > File Systems and click the plus icon labeled “Create and mount a file system.” From here we can choose from a basic EXT4 system all the way to BTRFS. Make sure to pick the system appropriate for your use case. In this example I’m using the array for application storage, particularly Docker, so EXT4 is ideal.
The next page asks for device selection. The previously created array should be visible in the dropdown as an mdX device along with any other disks installed on the system. The individual drives that make up mdX should not be visible. The following step will ask you to select the file system to be mounted along with a usage alert. Upon completing these steps, the new file system should be mounted in OMV and visible in the file system tab of the GUI.

ZFS
ZFS requires the system be booted with the PVE kernel prior to installing any ZFS plugins or configuration.

Find the ZFS plugin under System > Plugins > openmediavault-zfs.
Once it is installed, the navigation bar should have a new zfs tab under Storage. Make sure any drives destined for the ZFS pool have been wiped prior to proceeding.
Creating the ZFS Pool
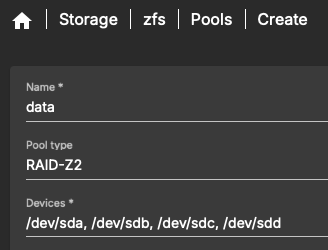
With clean drives, we can build our ZFS pool. Navigate to that new zfs tab and select Pools followed by the plus icon to add a pool. This opens the pool creation menu.
Give the pool a name. I chose the name data as this pool will be used for data storage. Select the pool type and devices for the pool. In this example I’m using all 4x of my 2TB spinning drives in a RAIDZ2 configuration. This gives me 4TB of usable storage with the ability to sustain 2 disk failures. I kept the remaining options with their default assignments.
The pool will be created and visible from the the GUI. As seen here I have a 3.41TB pool which makes sense as I used 4x 2TB drives in a RAIDZ2 configuration.

ZFS File System
After creating the ZFS pool, it will automatically appear as a listed file system in the OMV GUI.

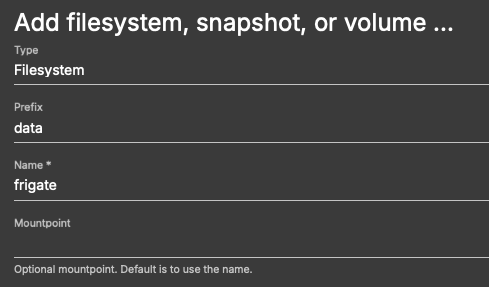
However, we should not create shares on top of this base ZFS pool instead we should create a dataset in that pool. By creating a data set, we can use some of the ZFS features like snapshots or set quotas and apply them just to that dataset. In the following example, I will be creating a dataset to store my Frigate footage. Start by navigating to the ZFS pool we just created and select it. Next, click the “Add” button denoted by the plus icon. This time we should be able to select “Add filesystem|snap|volume”. In the dialog box, we want “Type: Filesystem”, the prefix should autopopulate with the pool name, then we can add a name for this dataset.
Once the dataset is added, it will appear the ZFS Pools menu of the GUI along with its mount point. We can then select it and click the computer icon for “Properties”. Here we can modify the properties of the dataset, in this case I gave it a 1TB quota. All this is now visible in the File Systems GUI.

Final Thoughts
Setting up the RAID array and ZFS file system, along with mounting them is pretty straight forward in the GUI. Just remember the PVE kernel is required for ZFS along with additional plugins for both ZFS and mdadm. The biggest challenge for me was understanding how/why additional datasets are needed in ZFS for sharing folders along with the features it adds.
I outlined the above steps using examples from my setup but they can be repeated and varied depending on the use case.