Much of this section assumes a basic understanding of installing a Linux OS, connecting to the network, and accessing a remote machine either via webGUI or SSH.
Table of contents
Installing OpenMediaVault
Being based on Debian, OpenMediaVault uses a standard Debian installation wizard. I downloaded the latest stable ISO (OMV7 as of writing) and wrote it to a USB drive. Set the NAS to boot from USB then followed the steps. I feel anyone embarking on this journey shouldn’t need too much handholding here. For reference, here are links to the OpenMediaVault Installation Instructions and OMV Extras New User Guide.
OMV uses the entire boot disk for the installation. The boot drive is not intended to be used for storage. Keep that in mind when selecting a boot disk.
After a successful install, the OMV machine should boot to a CLI and display the assigned IP address.
Consider setting a static IP address for the OMV appliance. There are multiple ways to do this so I will not go into detail here.
OMV-Extras
My first step after booting into OMV was to install the omv-extras plugin. This is a repository of additional plugins for things like OS backups, Docker, and most importantly booting from flash media. See their website at omv-extras.org for more information and complete installation instructions.
For reference, at the time of this writing, the following command is entered to install omv-extras:
wget -O - https://github.com/OpenMediaVault-Plugin-Developers/packages/raw/master/install | bash
Booting from Flash Media

When booting from flash media there is always concern of excessive read/write cycles causing premature wear and disk failure. It’s basically mandatory to install the openmediavualt-flashmemory plugin shortly after installation.
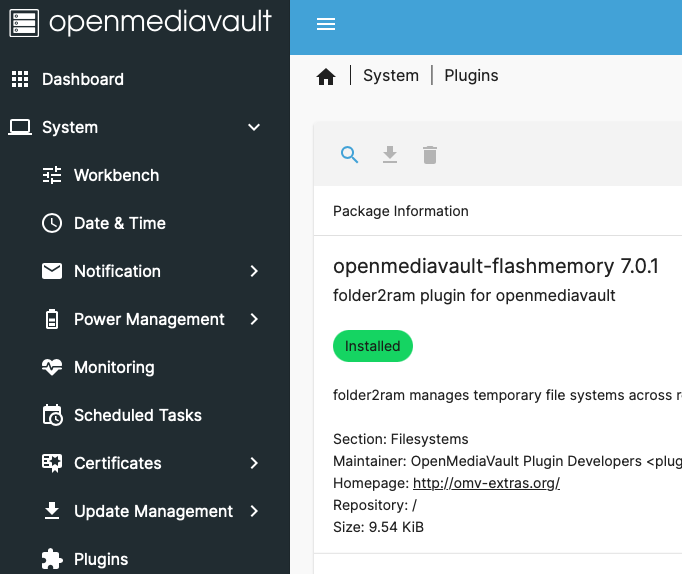
The above steps installed omv-extras which contains this plugin. From the OMV GUI, navigate to System > Plugins. Then find and install the openmediavault-flashmemory plugin. No configuration should be required.
Host Security

With OMV up and running the initial housekeeping out of the way, we need to make sure the host is secure. Hopefully, during the initial installation a secure root password was chosen. If not, log into the CLI as root and use the passwd command to update your root password.
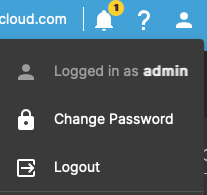
Next change the GUI admin password away from the default. From the GUI, click the person icon in the top right corner and select Change Password. Be sure to chose a strong password and probably not the same one as root.
The default GUI login user is admin with password openmediavault.
SSH Access
Ideally, SSH access should be key protected and root access disabled. I’m paranoid enough to enable key authentication but too lazy to disable root access. Anytime I’m in the CLI I need to perform root tasks anyways so I did not want to constantly elevate permissions.
From your workstation either generate a new SSH key ssh-keygen or use an existing key stored in ~/.ssh.
Copy this SSH key to the OMV server’s root user with ssh-copy-id -i ~/.ssh/{keyname} root@{omv.ip} Where {keyname} is the name of the SSH key on your workstation and {omv.ip} is the IP address of the OMV server.

You should now be able to SSH into the OMV root CLI using ssh -i ~/.ssh/{keyname} root@{omv.ip} bypassing a password authentication.
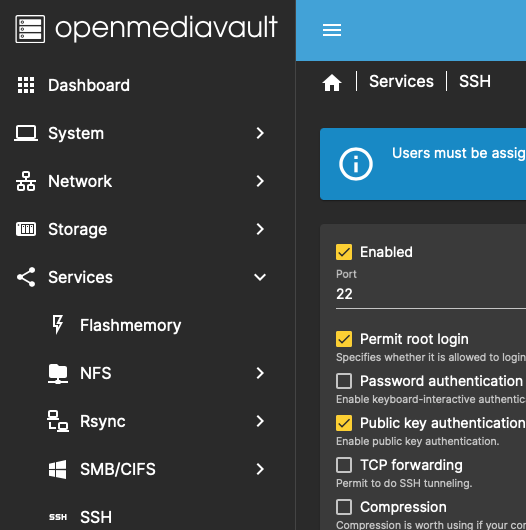
The last step is to disable password authentication. This is easiest done from the OMV GUI. Under Services > SSH just uncheck Password authentication then save and apply the config changes. This menu also has the options to disable root SSH login and some tips on adding users to the SSH group.
Now, only the those with the SSH key can remotely access the OMV root CLI and there won’t even be the option to brute force a password. This should provide for a relatively secure setup. Once again, security best practice says use SSH keys, disable root SSH, and use a regular user with elevated “sudo” privileges. In this case I’m allowing root SSH access with keys and no other users to have SSH access.